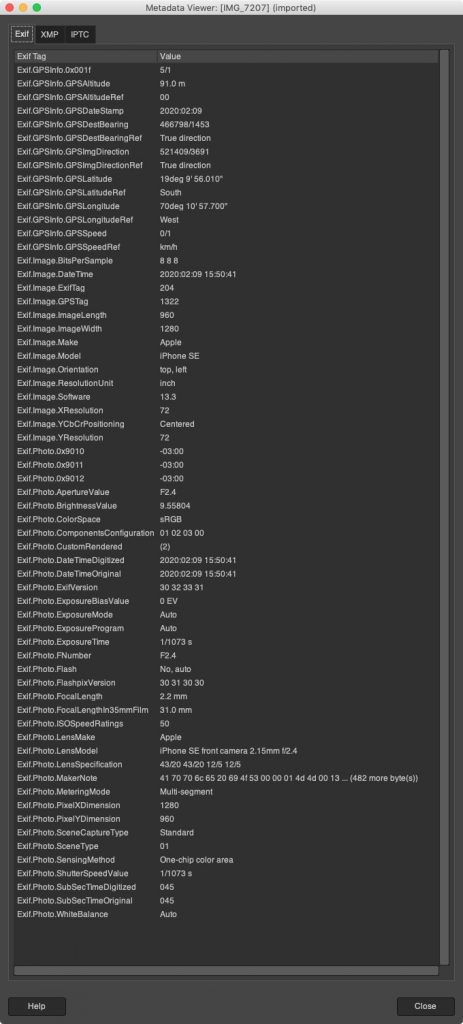
When you take a picture -let say with your phone- a file is created with a lot of information. Most of this represent the image (pixels) itself. But there are another kind of informations that “is” in the picture file: the EXIF.
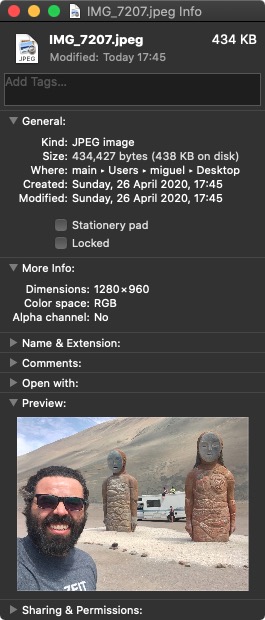
As an example, I will took a picture with my phone. Then I’ll download to my computer to “explore” what the picture has (apart from the visual information):
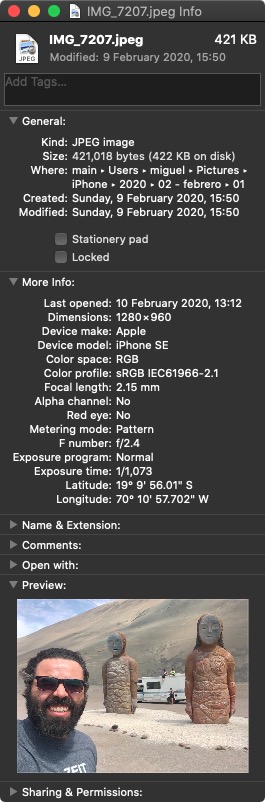
As you can see, a lot of information (that my Mac reveal) is letting me know that this picture was taken with an iPhone SE, the hardware lens config, the date, the resolution, and the most shocking one: the geolocation (latitude and longitude). As you can imagine, a lot of information with a single file.
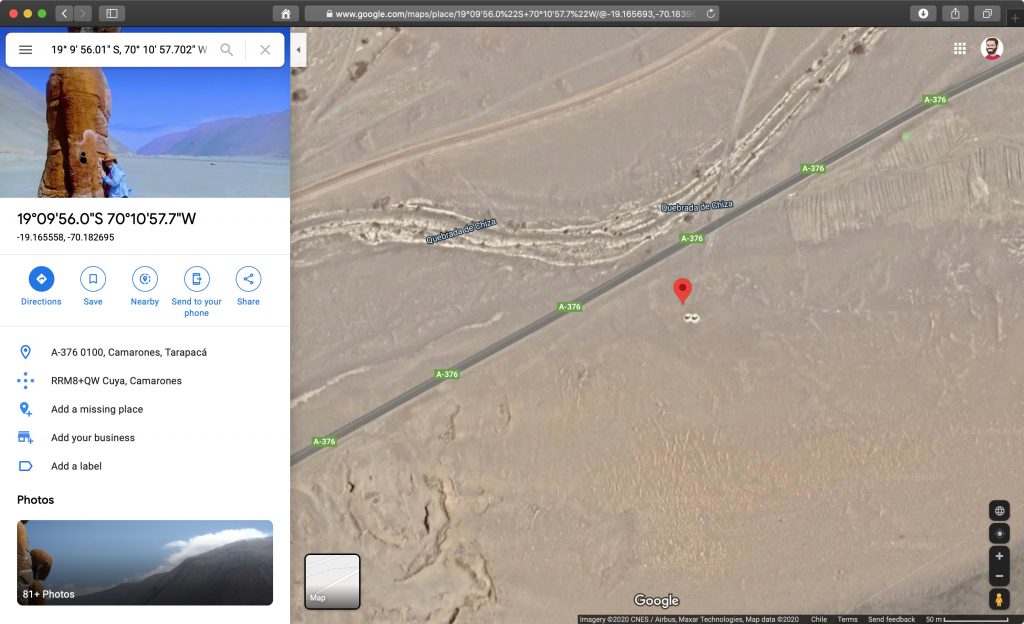
In the example, if I extract the geolocation (19° 9′ 56.01″ S, 70° 10′ 57.702″ W), and paste into Google Maps, you can “go” to the place in where the picture was taken. Cool right? mmmm, Maybe not.
Let say that we need to used a picture, and google-ing we find the right one. We decide to download and used in our webpage (without modifying). Technically, some “algorithms” could find the picture on our website and then analyze the EXIF. You can image what happened next (legally speaking).
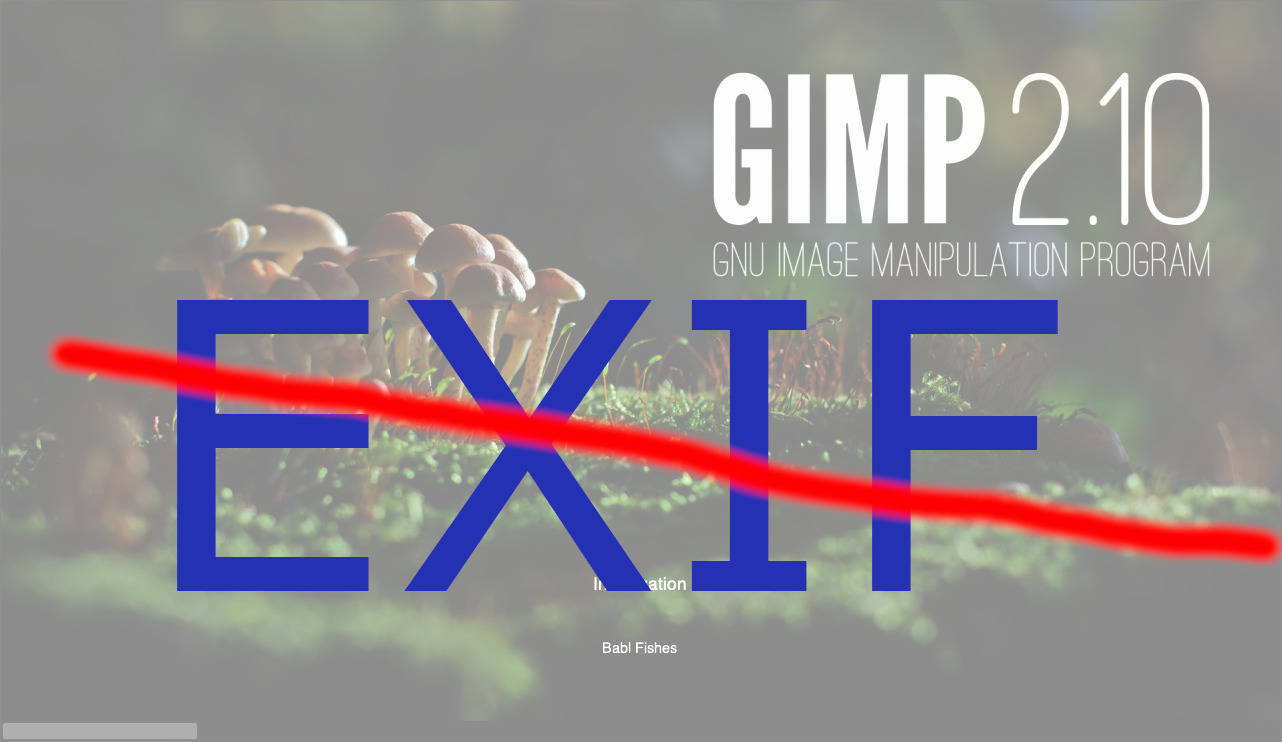
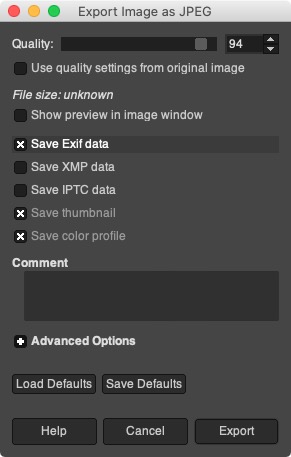
So then, to protect us from that, we can remove the EXIF from the original picture. In this case we can use GIMP, an open source for editing images.
Steps to remove the EXIF:
- Open the file with GIMP
- Select from the menu: “File / Export as…”
- Select the folder where you can store the new file
- Press the “Export” button
- De-select (uncheck) the “Save EXIF data”
Finally, you will see
If you only want to see the EXIF information of a picture (with GIMP), go to “Image > Metadata > View Metadata”