Recent version of ionic-ios > to 4.4.0 (ie: 4.5.4) has some problems. But this can by fixed removing console plugin:
sudo ionic cordova plugin rm cordova-plugin-console --save
That’s it

Just a personal clipboard …

Recent version of ionic-ios > to 4.4.0 (ie: 4.5.4) has some problems. But this can by fixed removing console plugin:
sudo ionic cordova plugin rm cordova-plugin-console --save
That’s it
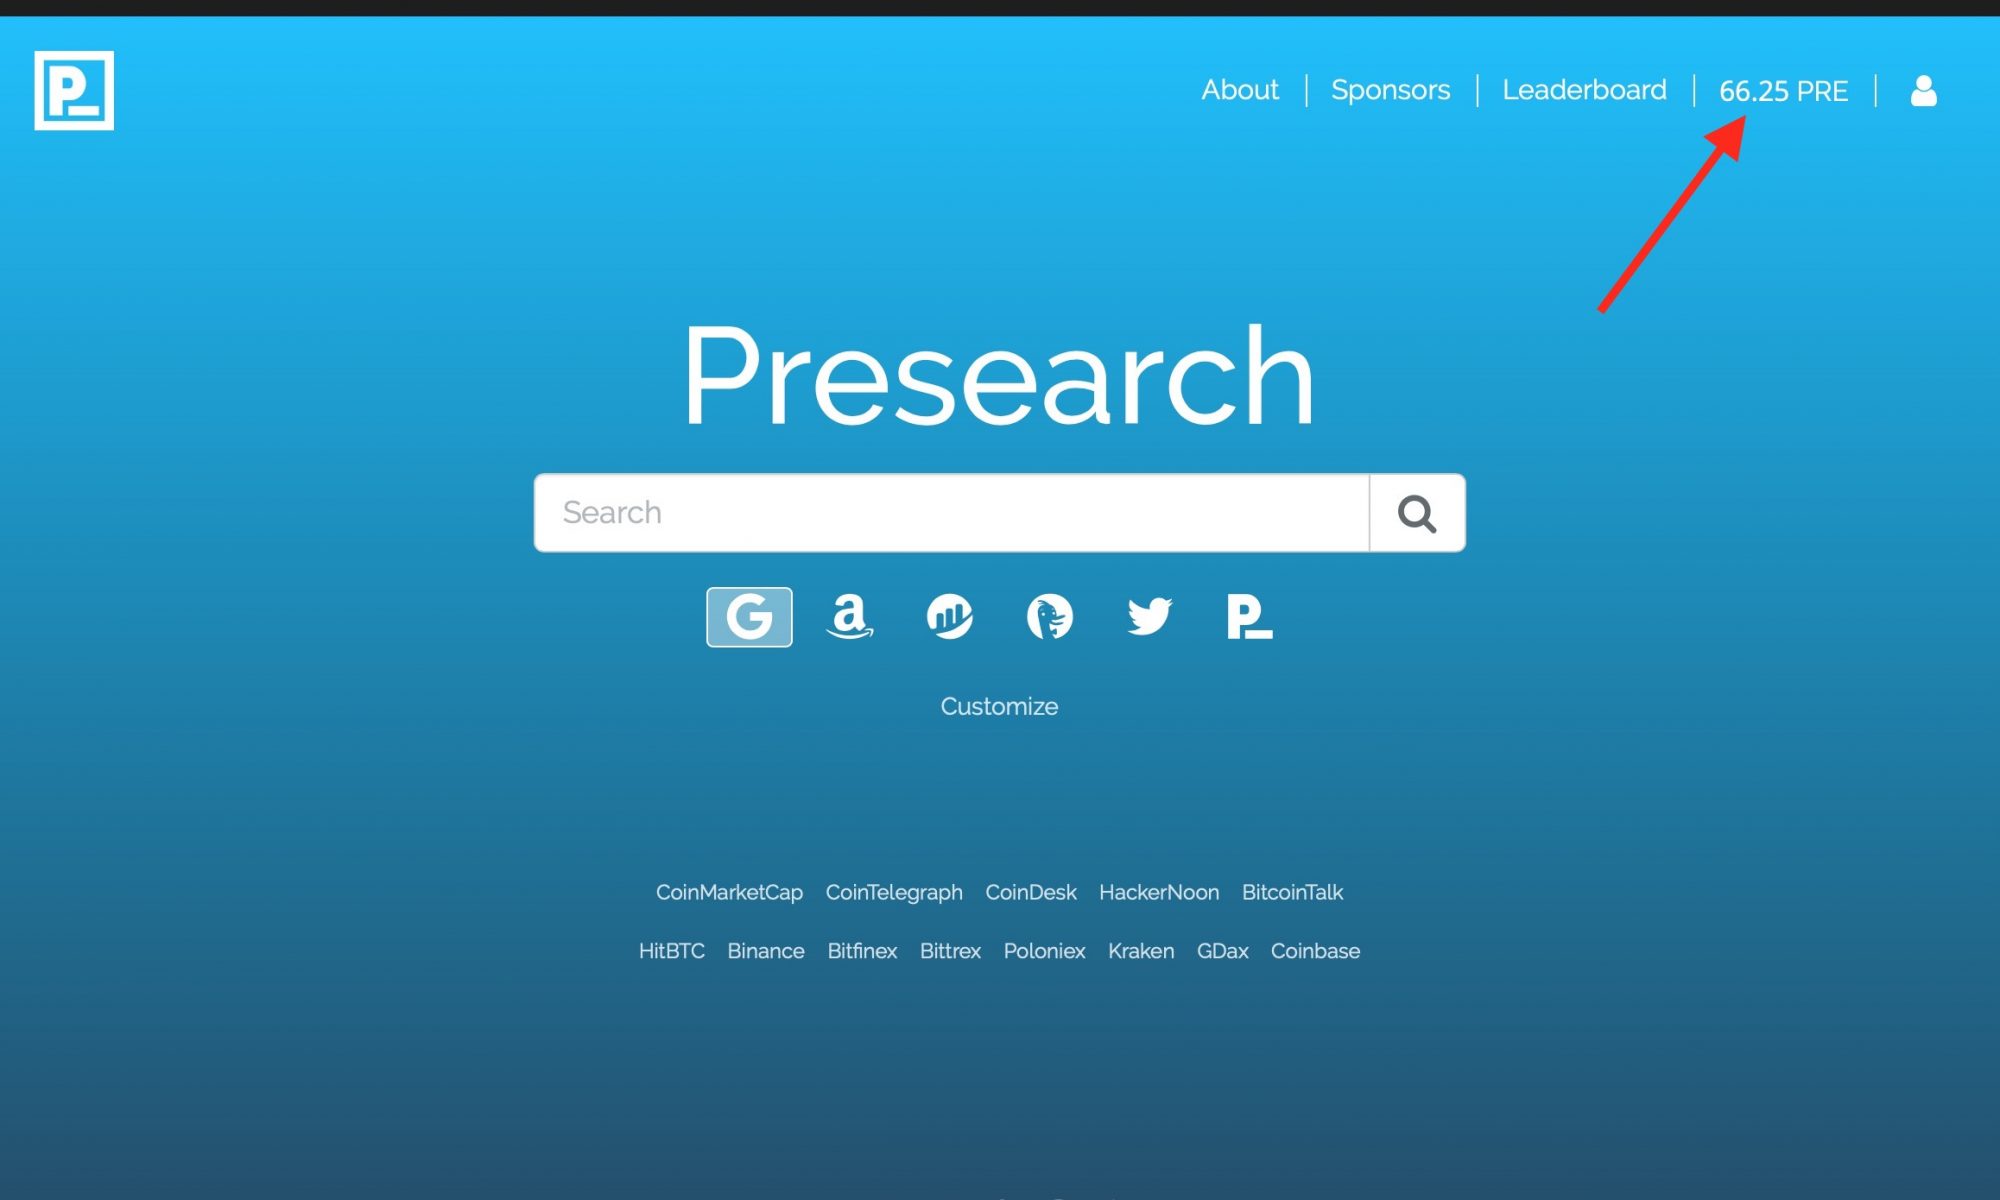
In Chrome, just add (and make it Default):
https://www.presearch.org/search?term=%s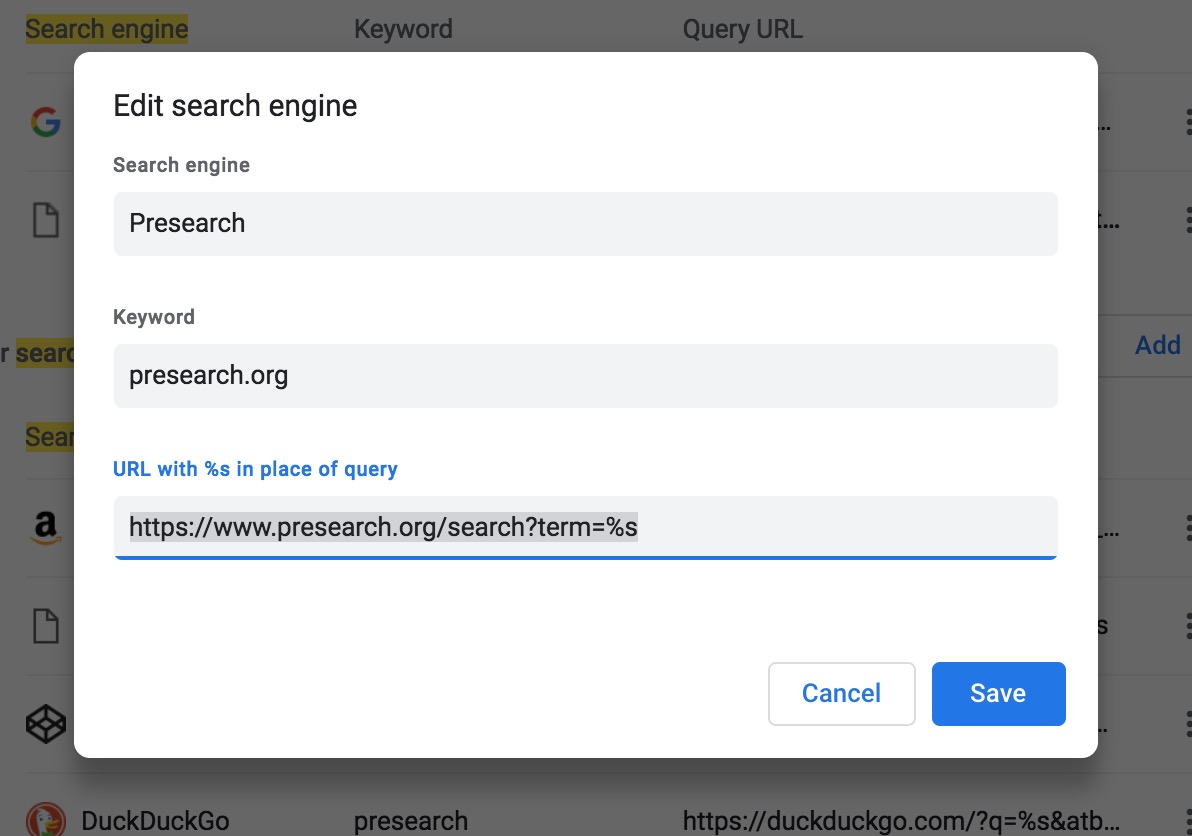
In Safari it is a little bit different. By default, Safari only has 4 search engine (you can see in the Preferences / Search tab) but you can not add a new one.
The solution is add an extension to do that: Omnikey (http://marioestrada.github.io/safari-omnikey/). Once you install it, you just add:
https://www.presearch.org/search?term={search}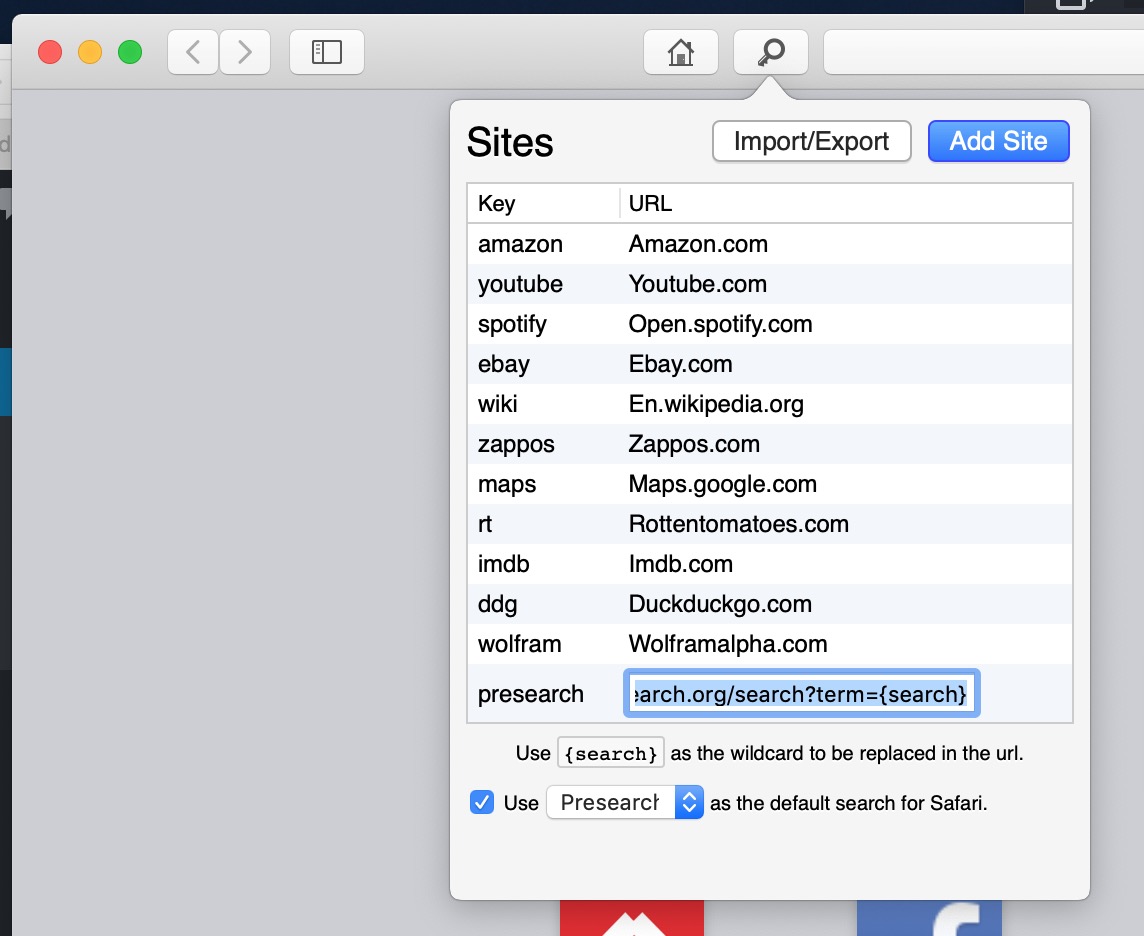
And just like that, your next search (a preSearch) add “PRE” to your virtual currency.
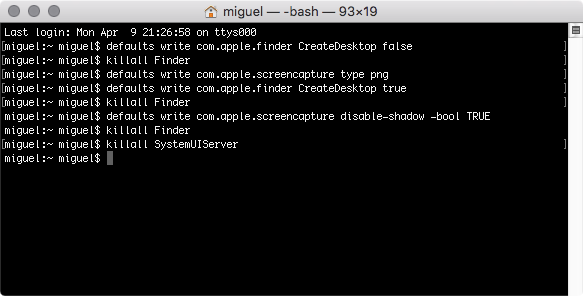
Sometime we need to make some tweaks en our OS. Most of the time this options are in “System preferences” via the UI, but other “hidden” options are available from the CLI (Terminal), like:
defaults write com.apple.screencapture type jpg
killall Finder
this command change the default scheenshot format (PNG) to JPG
defaults write com.apple.screencapture disable-shadow -bool true
killall SystemUIServer
to disable drop shadows on a screenshot
defaults write com.apple.finder CreateDesktop false
killall Finder
this one hide all icons in the desktop. To revert this, change to “true”
defaults write com.apple.dock persistent-apps -array-add '{"tile-type"="spacer-tile";}'
killall Dock
add space to the icon’s docks

defaults write com.apple.finder AppleShowAllFiles true;
killall Finder
show hidden files/folders (false to hide)
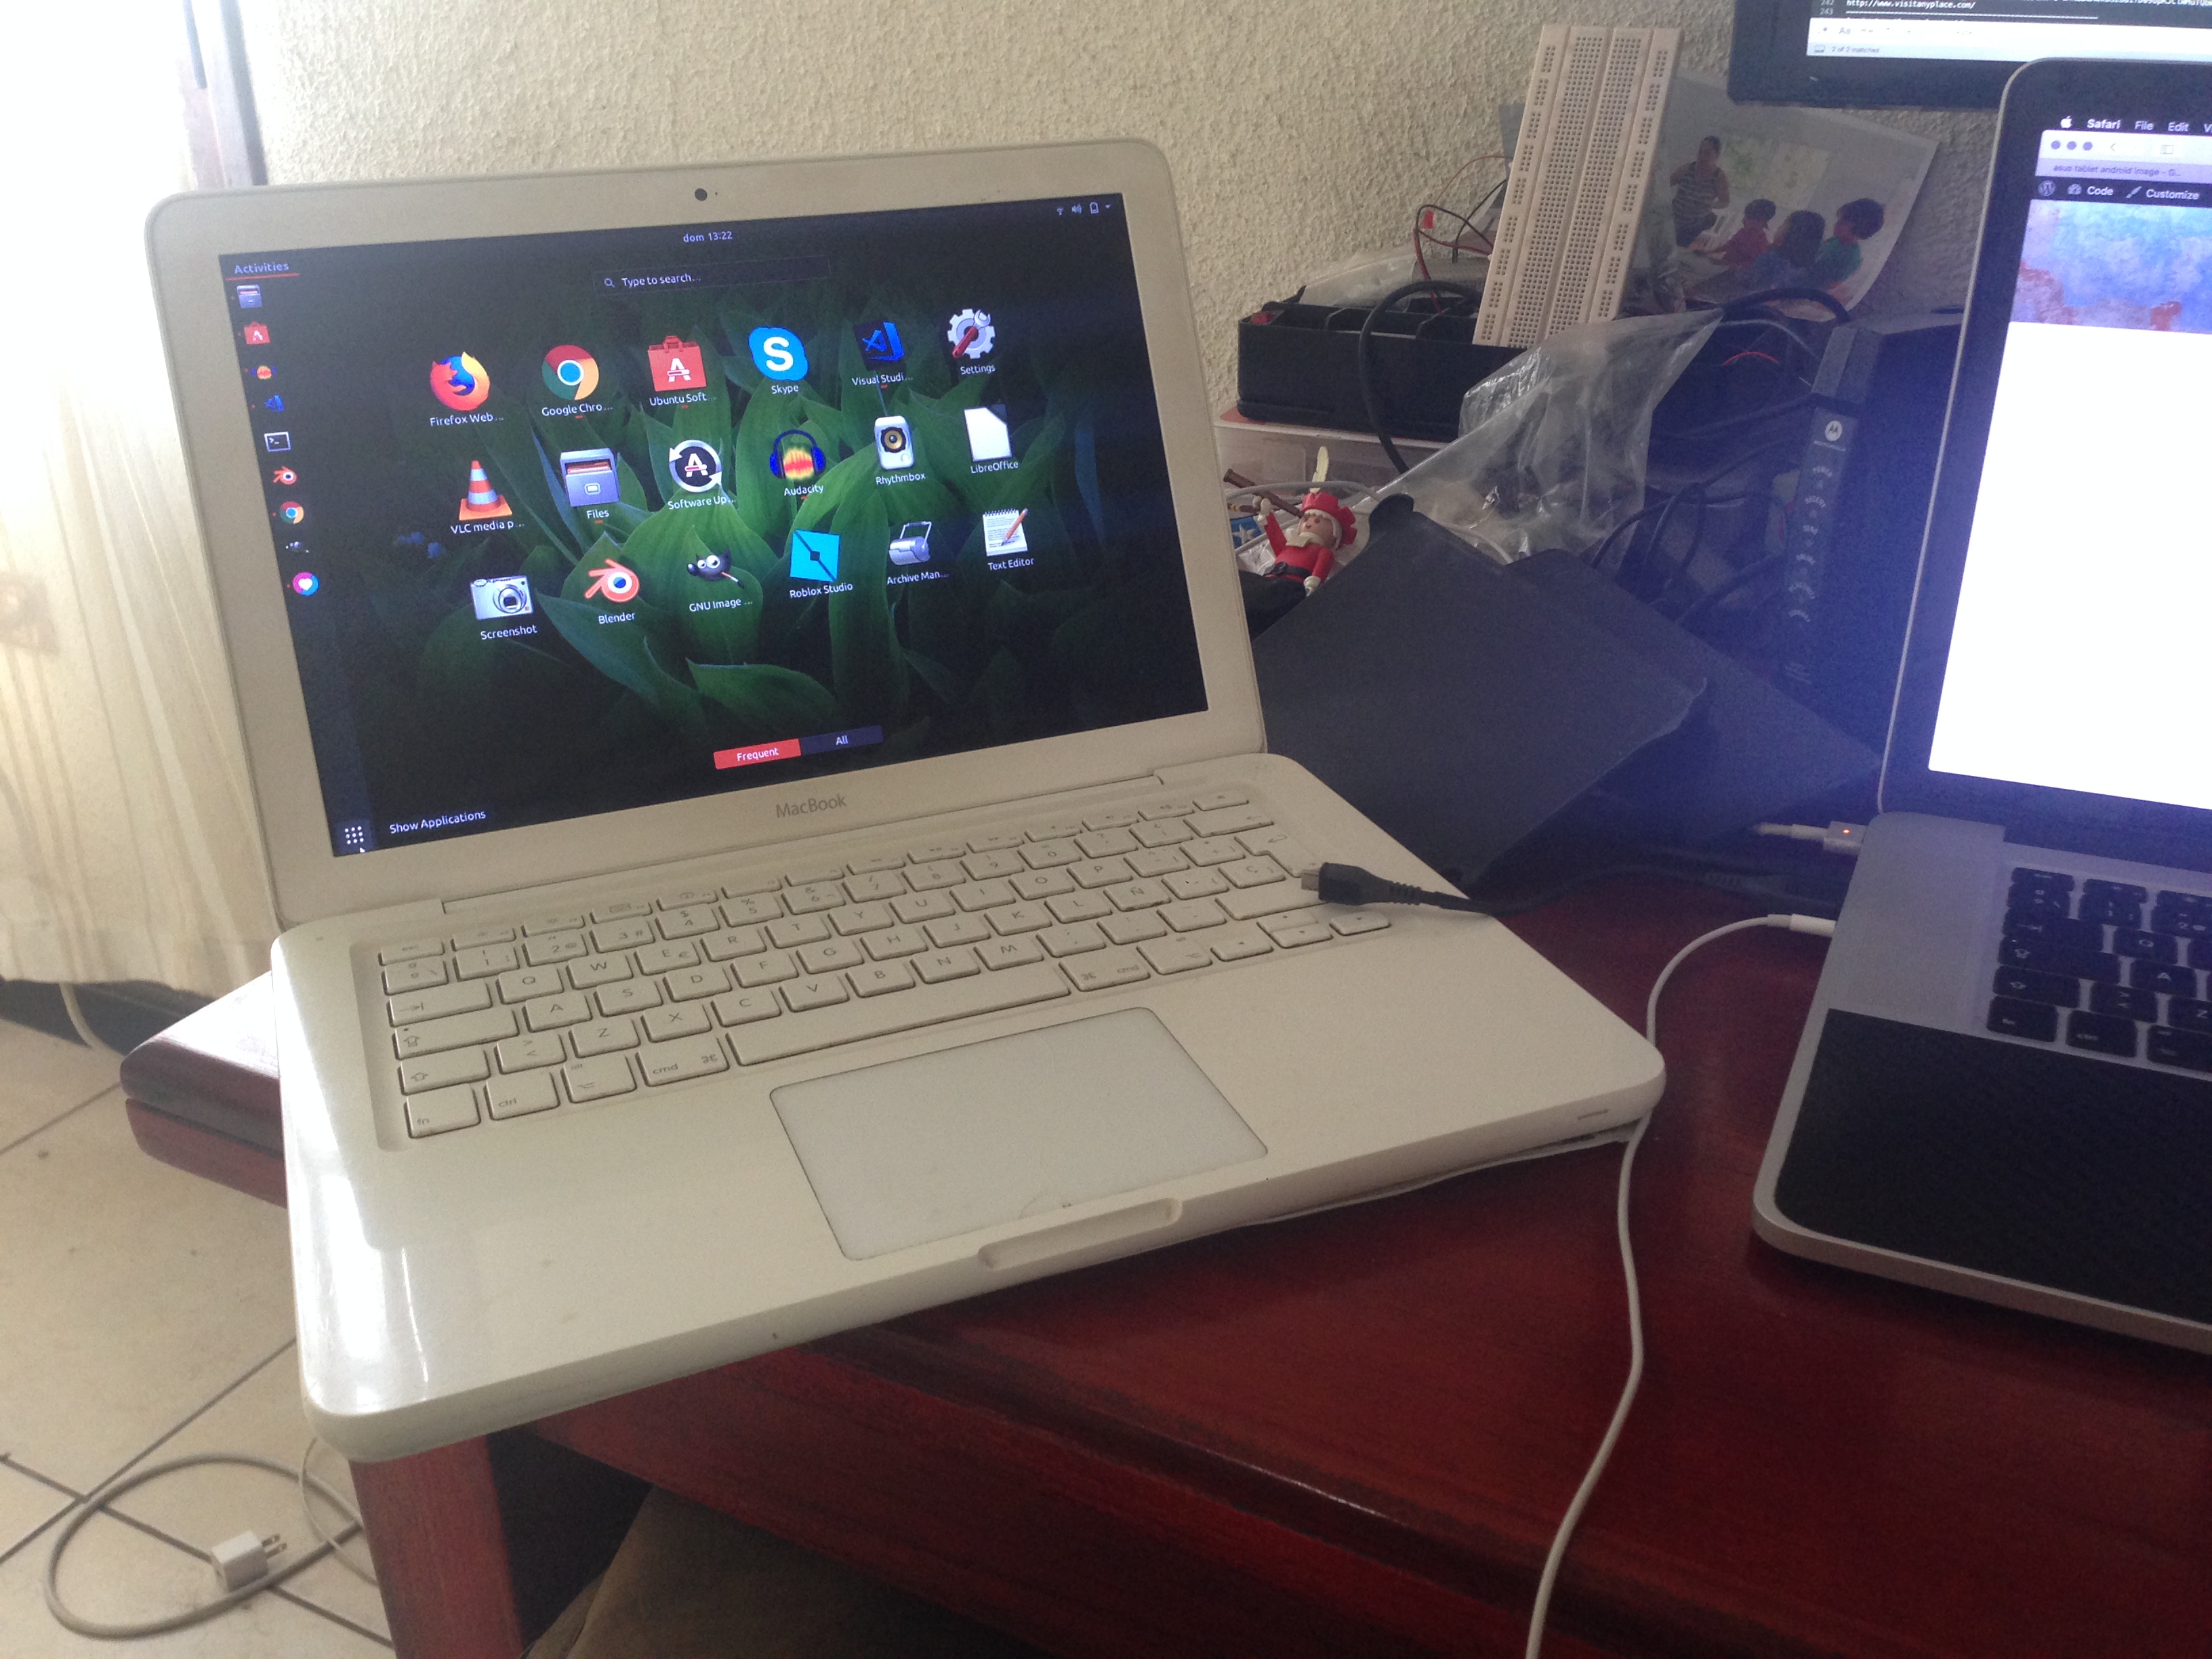
I’ve an old MacBook (late 2009 with 4GB of RAM) and for this time some programs like Skype doesn’t work anymore. So I’m installing Ubuntu to make this old Mac working again.
First, using a secondary laptop (a MacBook Pro with OSX High Sierra in my case) download Ubuntu.
Then, “burn” the .iso file onto an USB stick. To do that, you need to erase the USB:
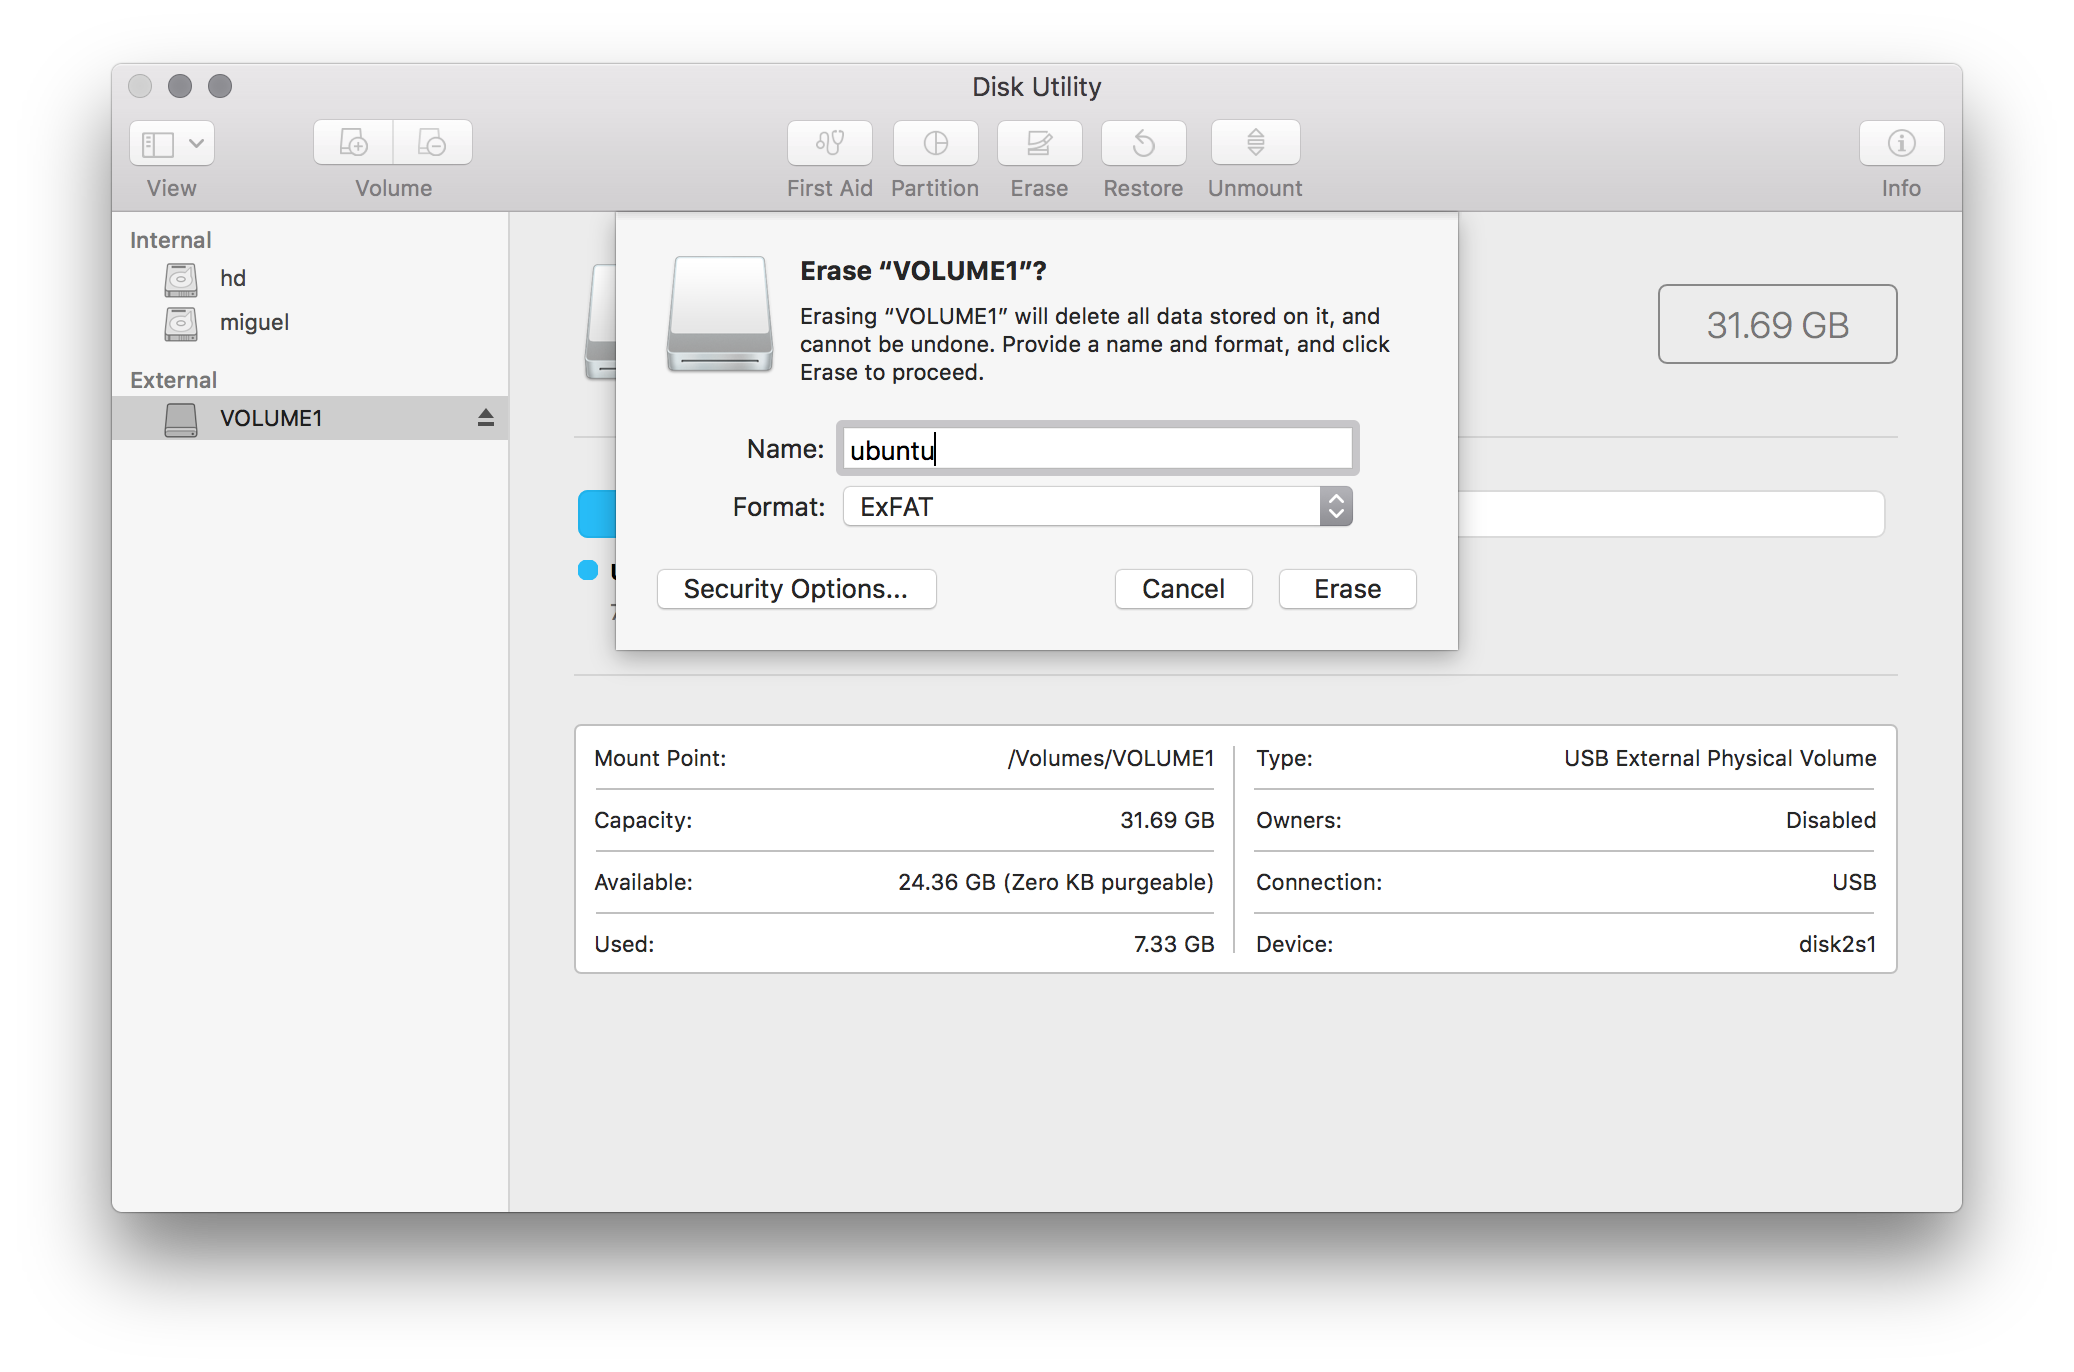
Then, Unmount the USB via DiskUtility
Then, open Terminal and type:
sudo diskutil list
It will list the connected USBs:
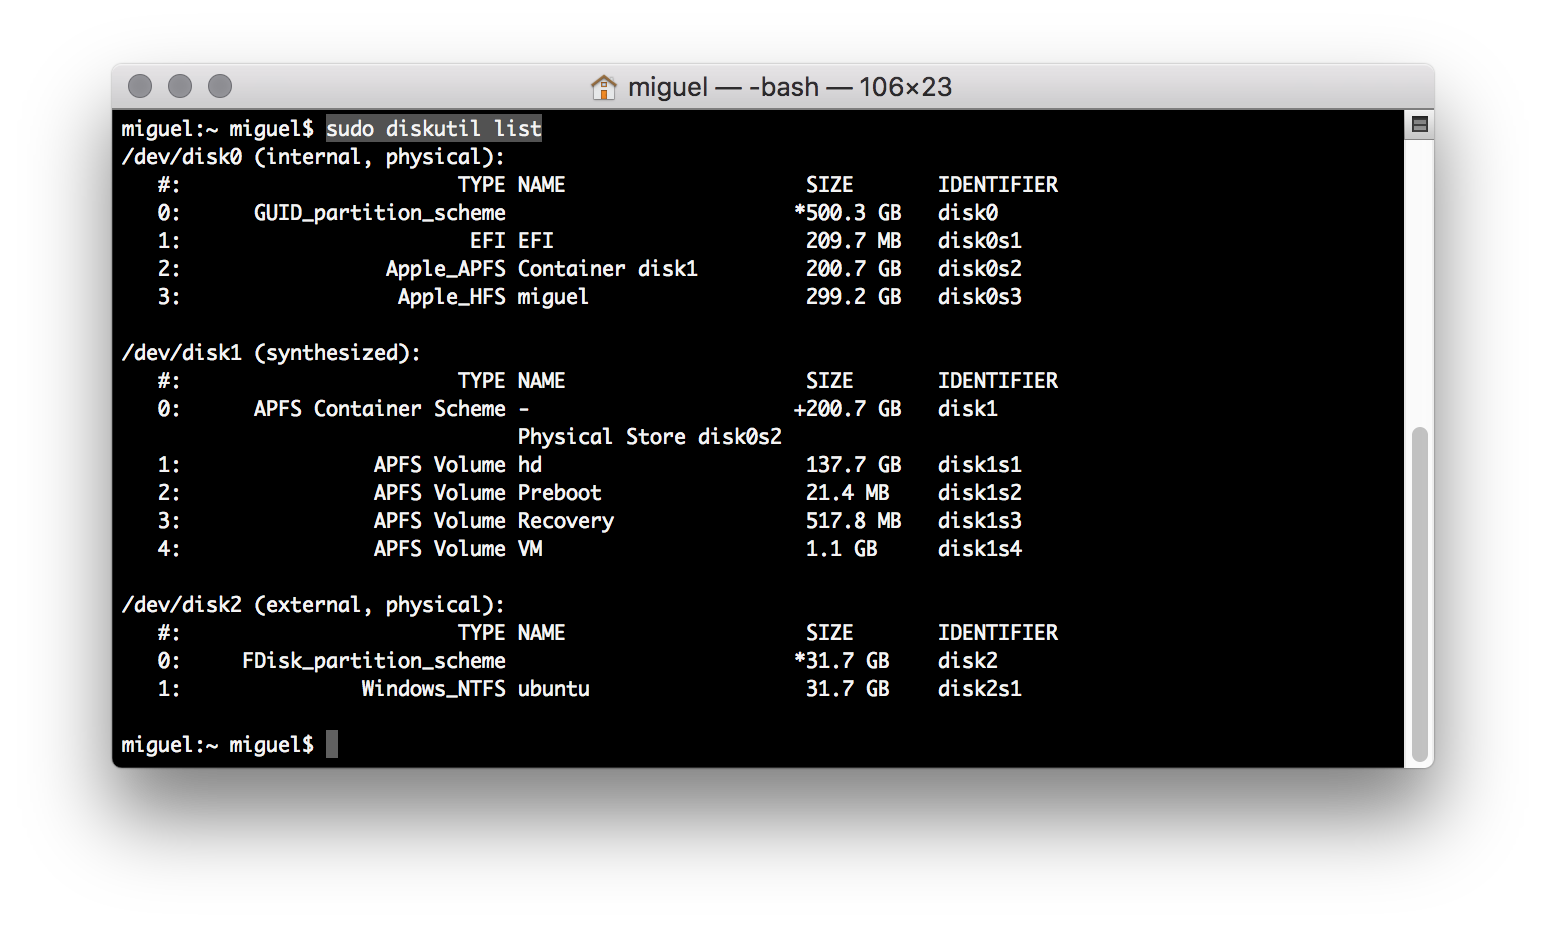
In this case disk2 is the USB.
Then, type:
sudo dd if=/Users/miguel/Downloads/ubuntu-17.10.1-desktop-amd64.iso of=/dev/disk2
Wait some minutes…
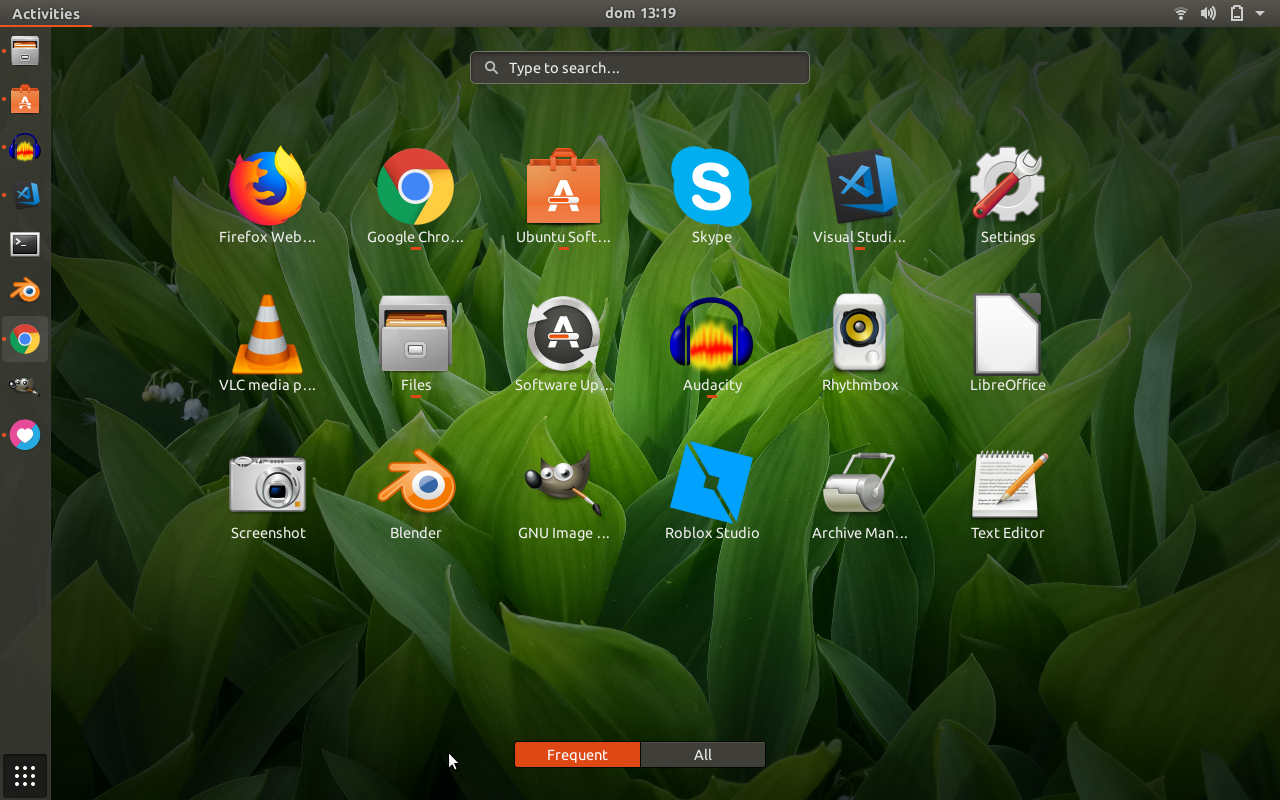
Finally, extract the USB and put it onto the final computer and turn it on. Then press Option/alt (⌥) key to boot from USB.
Final result:
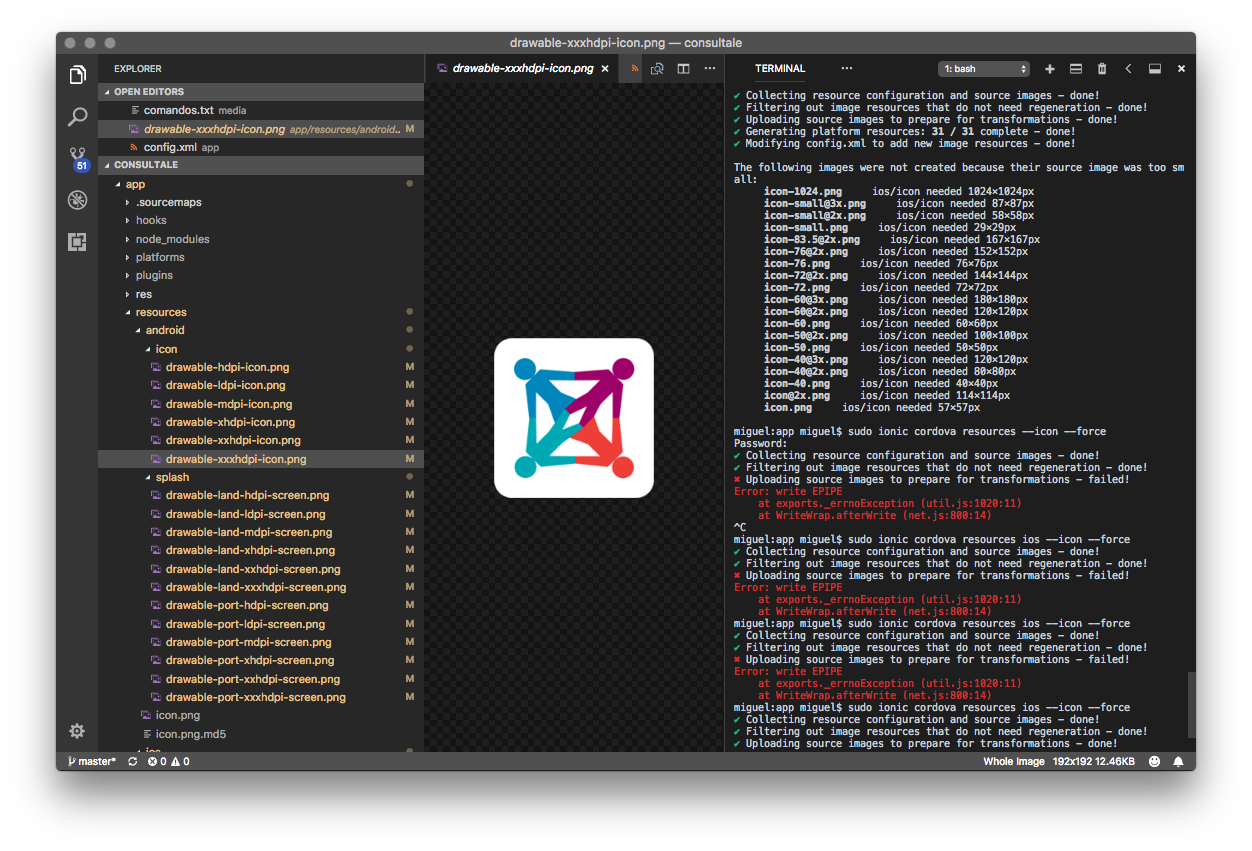
Sometime Ionic doesn’t generate 1024×1024 icon. Apple now required this icon size. To force generate the icon execute:
sudo ionic cordova resources ios --icon --force
Otherwise, ionic will say: “The following images were not created because their source image was too small:”
Ionicons are awesome, but sometime we need more. Then, awesomeFonts come to scene.
First, install font-awesome:
sudo npm install --save font-awesome
Then, in the project root, create a file called script/copy-custom-libs.js with:
const existingConfig = require('../node_modules/@ionic/app-scripts/config/copy.config');
module.exports = Object.assign(existingConfig, {
    copyFontawesomeFonts: {
      src: ['{{ROOT}}/node_modules/font-awesome/fonts/**/*'],
      dest: '{{WWW}}/assets/fonts'
    },
    copyFontawesomeCss: {
      src: ['{{ROOT}}/node_modules/font-awesome/css/font-awesome.min.css'],
      dest: '{{WWW}}/assets/css'
    }
  }
);
Finally, in package.json add:
"config": {
  "ionic_copy": "./scripts/copy-custom-libs.js"
},
So, the next time you compile your project, the awesome-font will be in www/assets/
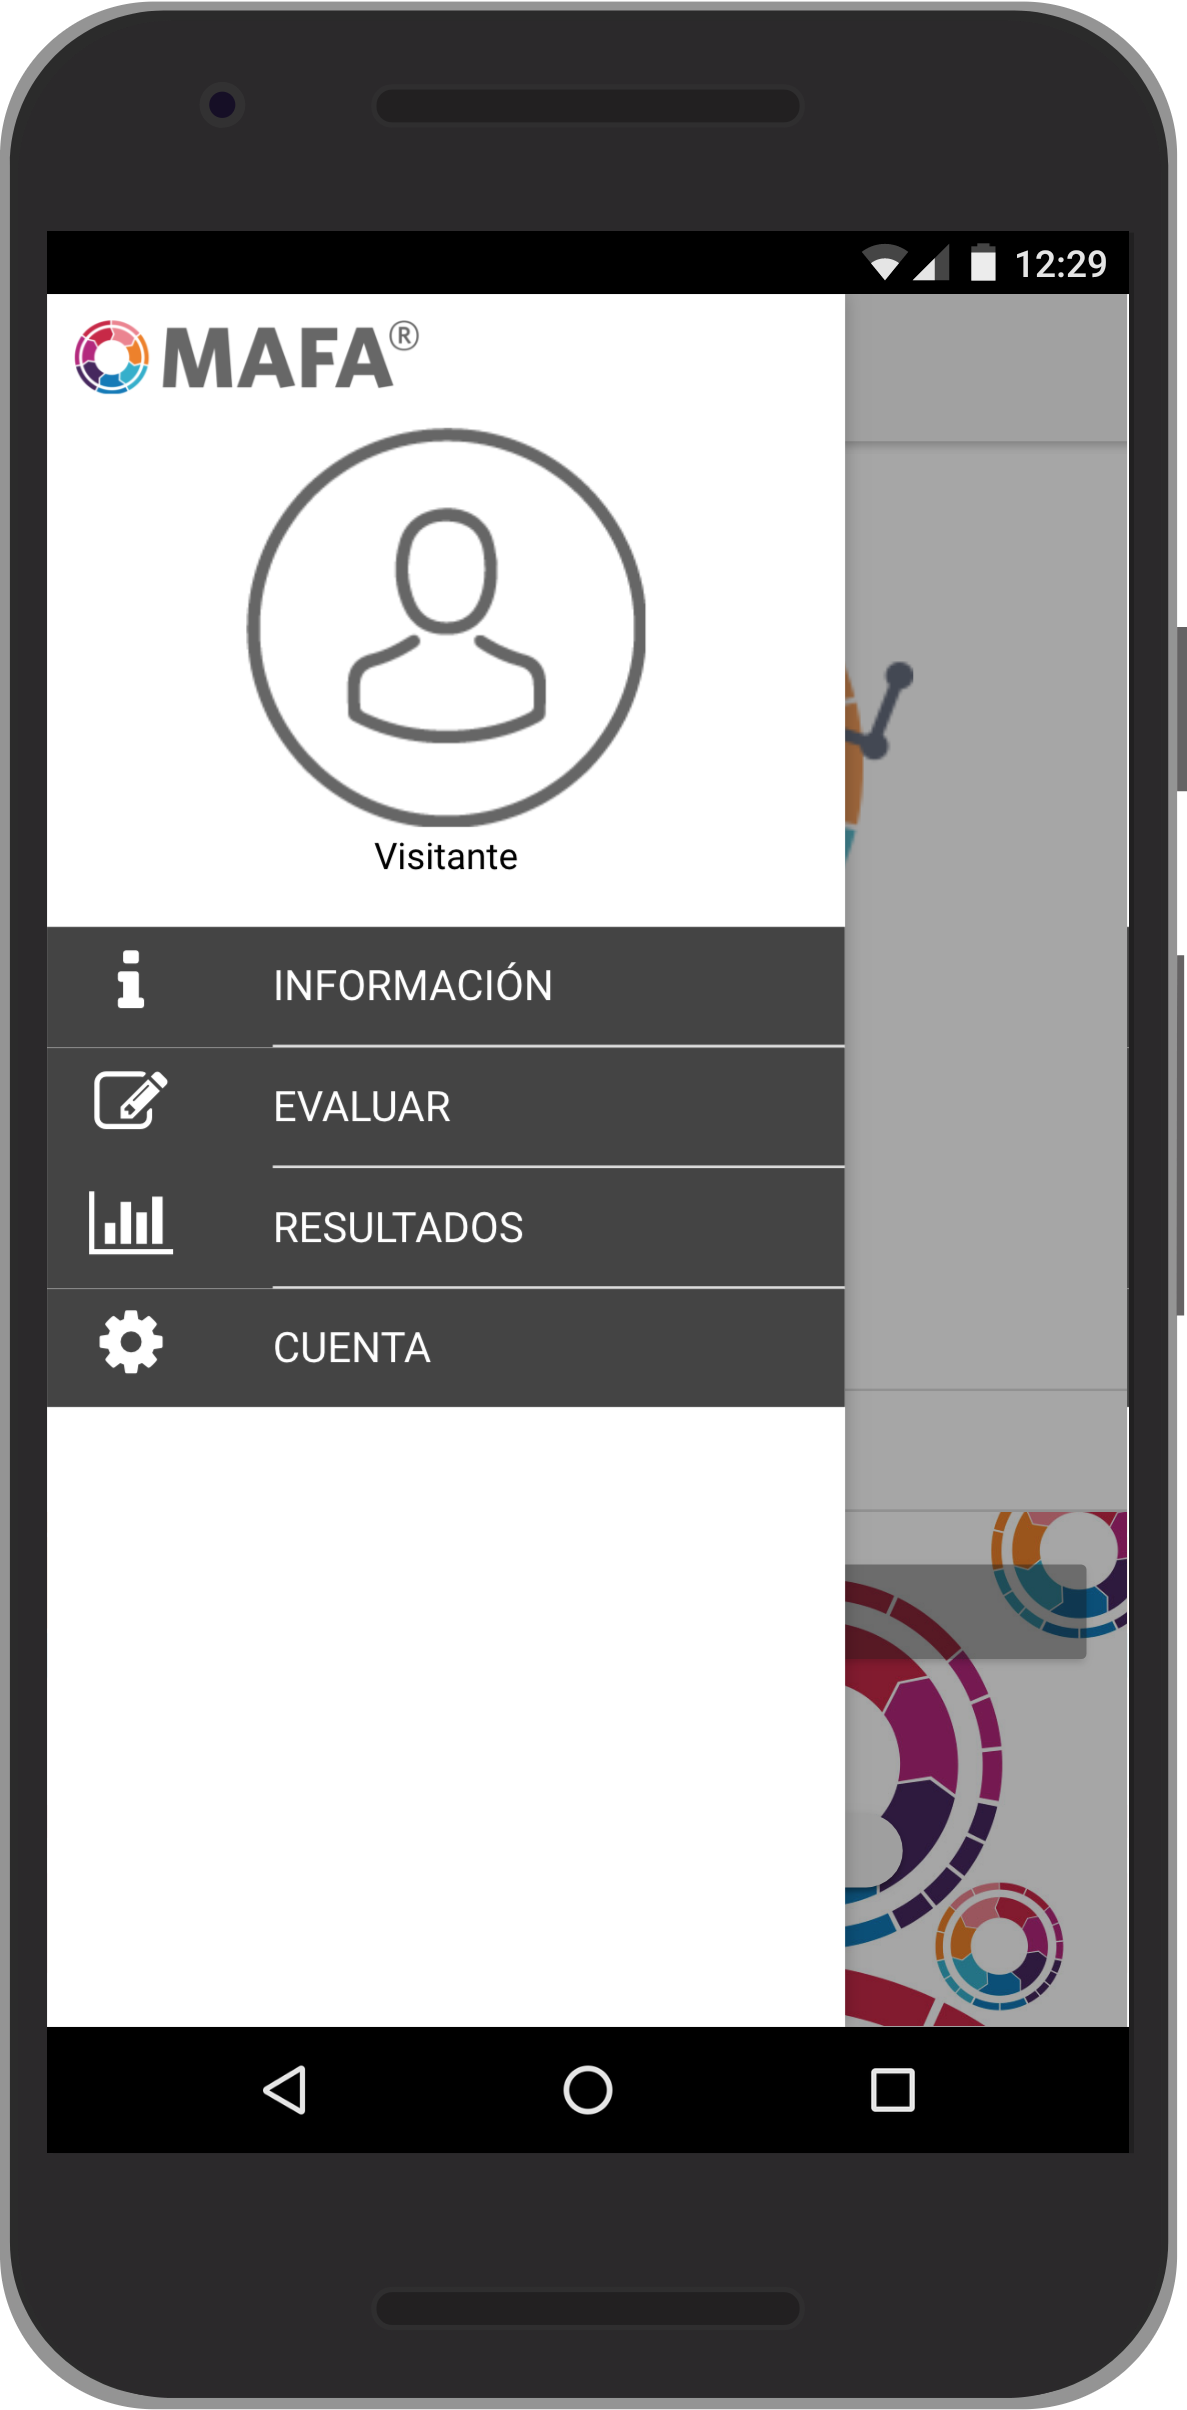
You can use this fonts in the side-menu:
    <ion-list>

      <ion-item menuClose ion-item class="franja_menu" (click)="irAPagina('InformacionPage')">
        <ion-icon class="fa fa-info icono_menu" item-start></ion-icon>
        INFORMACIÓN
      </ion-item>

      <ion-item menuClose ion-item class="franja_menu" (click)="irAPagina('EvaluarPage')">
        <ion-icon class="fa fa-pencil-square-o icono_menu" item-start></ion-icon>
        EVALUAR
      </ion-item>

      <ion-item menuClose ion-item class="franja_menu" (click)="irAPagina('ResultadosPage')">
        <ion-icon class="fa fa-bar-chart icono_menu" item-start></ion-icon>
        RESULTADOS
      </ion-item>

      <ion-item menuClose ion-item class="franja_menu" (click)="irAPagina('CuentaPage')">
        <ion-icon class="fa fa-cog icono_menu" item-start></ion-icon>
        CUENTA
      </ion-item>

    </ion-list>
Or, use it in the page header:
<ion-header>
  <ion-navbar>
    <button ion-button menuToggle>
      <ion-icon name="menu"></ion-icon>
    </button>
    <ion-title>Mi Cuenta</ion-title>
    <ion-buttons end>
      <button ion-button icon-only (click)="salir()">
        <ion-icon class="fa fa-sign-out"></ion-icon>
      </button>
    </ion-buttons>
  </ion-navbar>
</ion-header>
I just remember the time when I use Dreamweaver, because of the WYSIWYG. Jumping some years, recently I found VS Code, and wow! No only because is open source, but it’s fast, beautiful, customizable, multi-platform, plugin ready, git manager, terminal integrated, …
And my favorite plugins are:

keytool -genkey -v -keystore app_name.keystore -alias app_name -keyalg RSA -keysize 2048 -validity 10000
You need to give a password for this file. Finally, the app_name.keystore is generated.
Assuming we are building an ionic app, here are the commands
sudo ionic cordova build android --release --prod
to compile, and generate the non-signed .APK file: android-armv7-release-unsigned.apk
sudo chmod 777 ./platforms/android/build/outputs/apk
jarsigner -verbose -sigalg SHA1withRSA -digestalg SHA1 -keystore app_name.keystore ./platforms/android/build/outputs/apk/android-armv7-release-unsigned.apk app_name
/Users/miguel/Library/Android/sdk/build-tools/27.0.0/zipalign -vf 4 ./platforms/android/build/outputs/apk/android-armv7-release-unsigned.apk ./platforms/android/build/outputs/apk/app_name.apk
adb install -r ./platforms/android/build/outputs/apk/app_name.apk
adb logcat
Just in case you need to see the console.log directly from you terminal. It will show you everything happening in your phone.
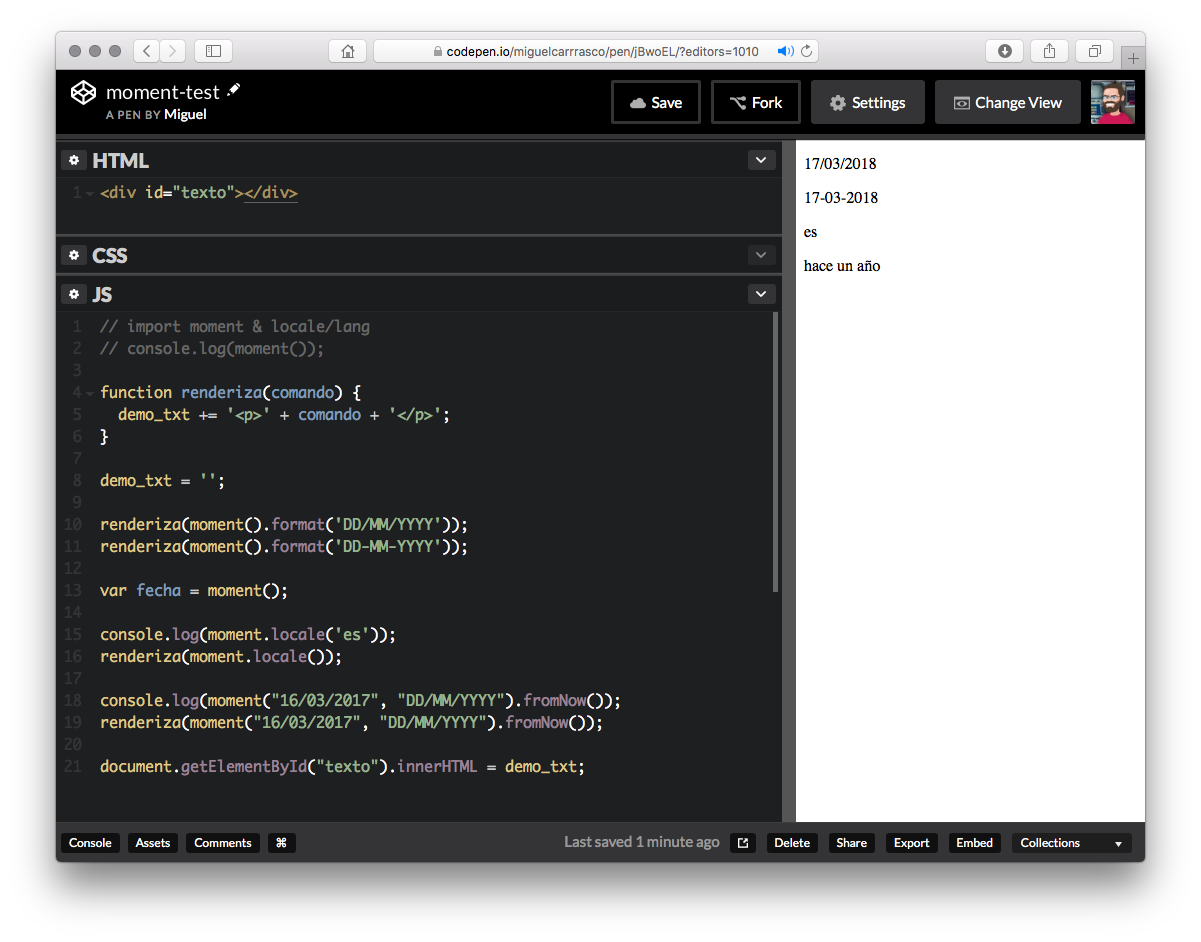
Some moment.js functions
See the Pen moment-test by Miguel (@miguelcarrrasco) on CodePen.
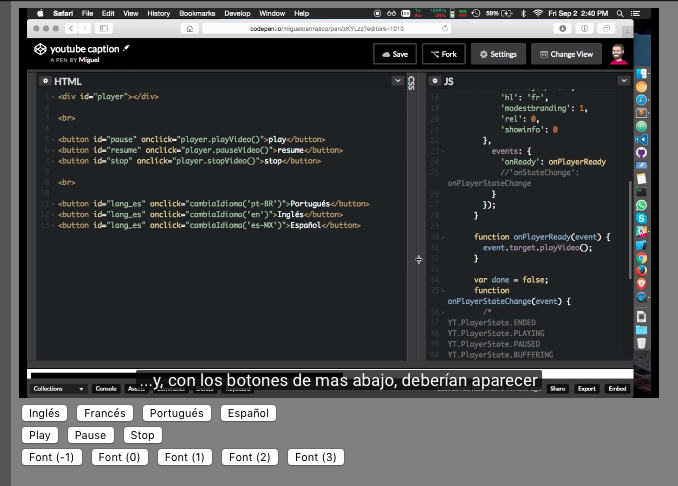
Have you ever need to add some captions in your youTube videos? Well, here an example of how to accomplish that. In this example I use 4 languages.
You can control the caption language, the video itself and the font size. All with JS
See the Pen youtube caption by Miguel (@miguelcarrrasco) on CodePen.